1.) Looking more like Rayne now
2.) The back of the top, now all shiny
3.) Top with suspender straps attached
4.) Front of the top (the suspenders can't be seen here)
5.) Flat out (the suspenders can't be seen here either)
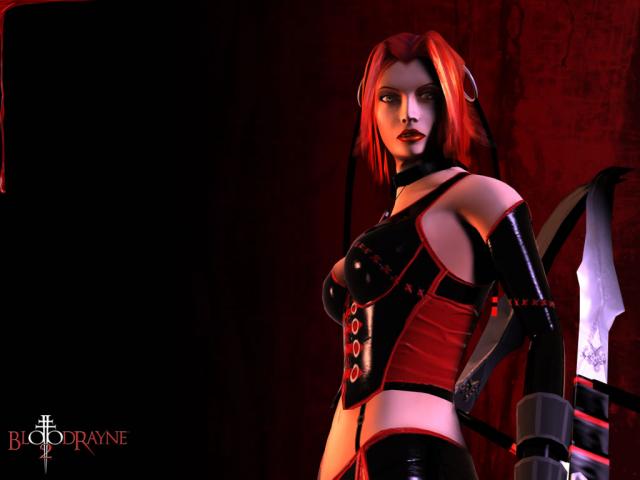
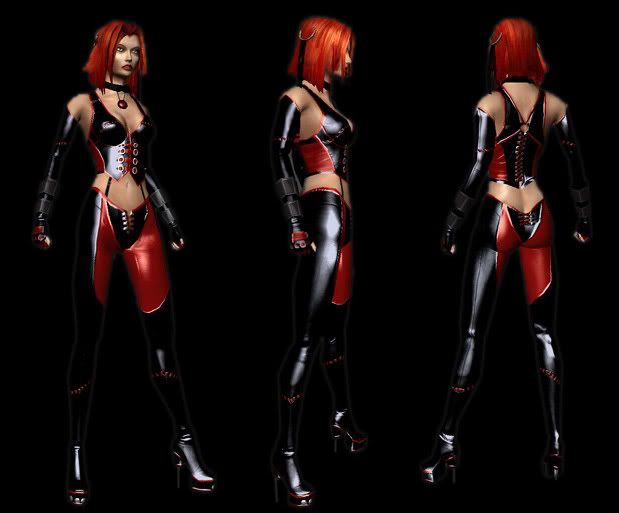
Here are some reference pictures for the top...
Rayne top reference 1
Rayne top reference 2
Rayne costume reference 1
Rayne costume reference 2
Rayne costume reference 3
With regards to the leggings, I've cut out the front panels for them, and just got to trace and cut out the ones for the back (which go up on to the rump as well). We're going to put ribbon around the edges of them, use the spray adhesive to stick them on, and then I'll take them off so they can be fused on with the iron. I've put velcro spots on the leggings at the top and on the thong with the cross patterns as I'll be wearing it over the top.
Hopefully I can get that done before I go away sailing, so when I get back all I'll then need to get done is the blades.
Saturday, 28 March 2009

Wednesday, 25 March 2009
The Brimstone Choker & Pendant (+ fangs!)
I have updates. The top, I promise, is on the brink of being finished, and I have pictures of the Brimstone choker and necklace I made.
1.) Front - flat out
2.) Back, where I put two little loopholes for the necklace
3.) Back - flat out
4.) Pendant - Brimstone symbol is drawn on with CD/DVD marker, which will rub off with a lot of effort....I've tried
5.) Looped and fastened with velcro stick on spots!
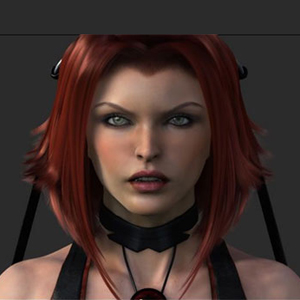
And here are two Rayne and Brimstone reference pictures...
Rayne Reference 1
Rayne Reference 2
Brimstone Reference 1
Brimstone Reference 2
As with all other parts of the costume, the Brimstone necklace has various features as well. I've kept it as simple as possible, going with the style shown in the fmv picture of Rayne, and the pendant without the two hammer-like pieces jutting out either side as in some depictions.
There are also two versions of the Brimstone symbol. One with a single straight line down and another with two. I went with the single one as it was easier to draw on to my pendant.
-------
Additionally, I also have my fangs...
1.) Fangs 1
2.) Fangs 2
They're Scarecrow natural smaller custom fit fangs. The problem with them was that after molding, for me they didn't stay on safely, so I'll be using fixodent to keep them on. This means to get lunch I'll have to pull them off and brush my teeth as they'll be all gooey with the fixodent stuff. Fun!
1.) Front - flat out
2.) Back, where I put two little loopholes for the necklace
3.) Back - flat out
4.) Pendant - Brimstone symbol is drawn on with CD/DVD marker, which will rub off with a lot of effort....I've tried
5.) Looped and fastened with velcro stick on spots!
And here are two Rayne and Brimstone reference pictures...
Rayne Reference 1
Rayne Reference 2
Brimstone Reference 1
Brimstone Reference 2
As with all other parts of the costume, the Brimstone necklace has various features as well. I've kept it as simple as possible, going with the style shown in the fmv picture of Rayne, and the pendant without the two hammer-like pieces jutting out either side as in some depictions.
There are also two versions of the Brimstone symbol. One with a single straight line down and another with two. I went with the single one as it was easier to draw on to my pendant.
-------
Additionally, I also have my fangs...
1.) Fangs 1
2.) Fangs 2
They're Scarecrow natural smaller custom fit fangs. The problem with them was that after molding, for me they didn't stay on safely, so I'll be using fixodent to keep them on. This means to get lunch I'll have to pull them off and brush my teeth as they'll be all gooey with the fixodent stuff. Fun!
Tuesday, 3 March 2009
Nigh on finishing the top
Front 1
Front 2
Back (yes I know the hair isn't straight - do you know how difficult it is to straighten your own hair when it's that length?)
What's left to do?
The cross-stitching across the breast area, the laces on the front (easy), the red strip at the bottom on the back, and the red strip over the top of the smaller eyelets but below the large eyelet.
Then it's finished. Myself and mum are having a bit of trouble figuring out how to do those two strips as I need the elasticated parts of the top there in order to do it up at the front. We've already made it a lot tighter on me.
The top is derived from three pictures of Rayne. One is from the first game and two are from the second.
BR1 Back
BR2 Side
BR2 Back
There are some distinct differences and similarities between them, but as I've said before, as many of the screen captures and concept arts differ in different parts of the costume design, I combined some of the bits from various screenshots and concept arts to fit the style of top I was using.
On another note, I have a piece of dowling and a piece of wood to make the first part of the mount for the blades. I just need to draw out the brackets on the plastic we have, get some wooden discs (about two to three different sizes), and two planks of pine as the balsa is too flimsy. Oh yeah! And the handles for them as well. This is all rather complicated...O_O'
Front 2
Back (yes I know the hair isn't straight - do you know how difficult it is to straighten your own hair when it's that length?)
What's left to do?
The cross-stitching across the breast area, the laces on the front (easy), the red strip at the bottom on the back, and the red strip over the top of the smaller eyelets but below the large eyelet.
Then it's finished. Myself and mum are having a bit of trouble figuring out how to do those two strips as I need the elasticated parts of the top there in order to do it up at the front. We've already made it a lot tighter on me.
The top is derived from three pictures of Rayne. One is from the first game and two are from the second.
BR1 Back
BR2 Side
BR2 Back
There are some distinct differences and similarities between them, but as I've said before, as many of the screen captures and concept arts differ in different parts of the costume design, I combined some of the bits from various screenshots and concept arts to fit the style of top I was using.
On another note, I have a piece of dowling and a piece of wood to make the first part of the mount for the blades. I just need to draw out the brackets on the plastic we have, get some wooden discs (about two to three different sizes), and two planks of pine as the balsa is too flimsy. Oh yeah! And the handles for them as well. This is all rather complicated...O_O'
Tuesday, 17 February 2009
I can't believe it's not leather, can you?
More of the top is done. I painted the front with glossy 3D fabric paint. The brand is DYLON, and it seems to give a leathery look rather well. The main issue is that with stretchy material it cracks a bit, but actually gives a really good effect.
Before that, on Sunday I took a couple of pictures wearing it to show how it fits - Sunday 1, Sunday 2.
I've only taken a couple of pictures since I painted it though. I'm only painting the front anyway. Doing all of it would ruin it, and in some pictures the front of the top is the only shiny bit (though on others it's shiny all over). Like I said before, there are several variations of the top depending on concept art and even in-game - leather 1, leather 2.
Even more coming soon...
Before that, on Sunday I took a couple of pictures wearing it to show how it fits - Sunday 1, Sunday 2.
I've only taken a couple of pictures since I painted it though. I'm only painting the front anyway. Doing all of it would ruin it, and in some pictures the front of the top is the only shiny bit (though on others it's shiny all over). Like I said before, there are several variations of the top depending on concept art and even in-game - leather 1, leather 2.
Even more coming soon...
Friday, 13 February 2009
Top almost finished + hair dyed again!
The top isn't QUITE finished, but here are pictures with the two red side panels now on.
There are still more red ribbon trims to go around the edges and to finish off the pattern though.
Almost there!
Top (flat out)
Top (front)
I also dyed my hair again. This time I used the Schwartzkopf XXL Live colour to see if it came out any brighter. In artifical light, it doesn't look all that much better but it's still more vibrant depending on what kind of light hits it and where abouts I am standing in or around that light.
Examples:
1 (shows the colour really well - and it looks to be the right shade there)
2 (shows it about right but a little dimmer due to shadows)
3 (makes my roots look a bit orange - though they aren't - blarg)
4 (vibrant, but still the light makes it look a tad different - and I look tired)
5 (and the more shadowy variation in colour - imagine when I get the fangs!)
There are still more red ribbon trims to go around the edges and to finish off the pattern though.
Almost there!
Top (flat out)
Top (front)
I also dyed my hair again. This time I used the Schwartzkopf XXL Live colour to see if it came out any brighter. In artifical light, it doesn't look all that much better but it's still more vibrant depending on what kind of light hits it and where abouts I am standing in or around that light.
Examples:
1 (shows the colour really well - and it looks to be the right shade there)
2 (shows it about right but a little dimmer due to shadows)
3 (makes my roots look a bit orange - though they aren't - blarg)
4 (vibrant, but still the light makes it look a tad different - and I look tired)
5 (and the more shadowy variation in colour - imagine when I get the fangs!)
Sunday, 8 February 2009
Top progress
We've made some more progress with the top.
Flat out - with pins
Front
Back
There are more red trims to put on the bottom and on the back and around the side panels once they're ironed on. Then that'll be the top completely finished.
Following that, the remaining aspects of the costume will be:
* Trying to obtain a Brimstone necklace (which may be possible, otherwise I'll have to substitute it)
* Add the red pattern on to the leggings (not going to be very easy)
* Getting the blades cut out, painted, and the mechanism made.
After that, theoretically I should be pretty much done.
Flat out - with pins
Front
Back
There are more red trims to put on the bottom and on the back and around the side panels once they're ironed on. Then that'll be the top completely finished.
Following that, the remaining aspects of the costume will be:
* Trying to obtain a Brimstone necklace (which may be possible, otherwise I'll have to substitute it)
* Add the red pattern on to the leggings (not going to be very easy)
* Getting the blades cut out, painted, and the mechanism made.
After that, theoretically I should be pretty much done.
Saturday, 7 February 2009
Boots - the stripes
I've now done the red stripes on the boots - with red insulation tape. It will come off easily without ruining them, hence why I used it. The problem with the tape is that it's difficult to shape, and therefore some parts may not look absolutely perfect. I've done my best with them for now though.
Boots: 1, 2, 3, 4.
I didn't take that much time over that, so I can probably tidy them up a bit more.
I thought it was better to put the stripes on as it makes them look more like how the boots are supposed to be, though without the spike. That's as near as I'm going to get them.
It's the angle up the arch of the foot that makes the stripes there look a little weird, but alas! I can't change the shape of the boots and that's as close as I can get to the actual shape of them.
I think they look good enough. ^_^
Boots: 1, 2, 3, 4.
I didn't take that much time over that, so I can probably tidy them up a bit more.
I thought it was better to put the stripes on as it makes them look more like how the boots are supposed to be, though without the spike. That's as near as I'm going to get them.
It's the angle up the arch of the foot that makes the stripes there look a little weird, but alas! I can't change the shape of the boots and that's as close as I can get to the actual shape of them.
I think they look good enough. ^_^
Subscribe to:
Posts (Atom)